IBE User Guide
1. Overview
This user guide provides step-by-step instructions for booking through the SorasoOne Internet Booking Engine (IBE). It covers how to open the system, set check-in and check-out dates, and configure rooms and guests. Users will learn how to search for available rooms, select rate packages, and add them to the cart. The guide also explains entering guest details, accepting terms, and completing payment securely. Overall, it ensures hotel guests can complete an online reservation smoothly from start to finish
2. Open the IBE
This step explains how to access the hotel’s booking system through the SorasoOne IBE website. By opening the given URL in a browser, users will arrive at the homepage with a search bar to begin the booking process.
To perform the task (Step-by-Step)
-
Open a web browser and enter the following URL: https://soraso-ibe-xxxxx.com/
-
Press Enter.
-
Wait until the page finishes loading. The IBE homepage will appear with a search bar containing the
following fields:
- Check-in date
- Check-out date
- Number of rooms
- Number of adults
- Number of children/infants
- “Check Rates and Availability” button
Note: The IBE homepage offers both Thai, English, Vietnamese, Arabic language options. On the top left, the hotel logo is displayed, and on the top right, there is a cart icon where users can view their selected rooms summary.
3. Select Check-in and Check-out Dates
This step shows how to set the check-in (arrival) and check-out (departure) dates using the calendar. The chosen dates define the stay period, which the system uses to calculate available rooms and rates.
To perform the task (Step-by-Step)
- Click the date field in the search bar.
- The first field is for Check-in.
- The second field is for Check-out.
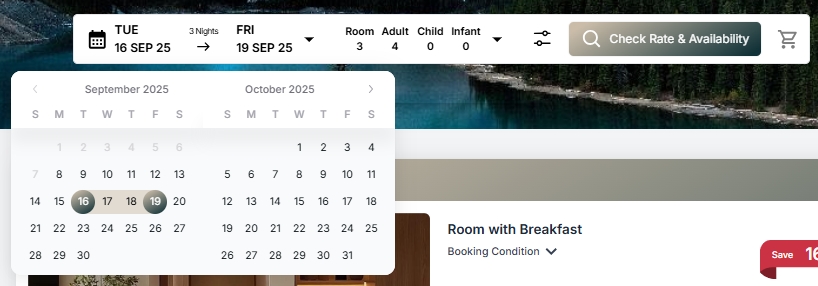
- A two-month calendar will appear. Select the desired check-in and check-out dates.
- Example: Choose Tuesday, 16 Sep 2025 as the check-in date and Friday, 19 Sep 2025 as the check-out date.
- The calendar will close automatically, and the selected dates will appear in the search bar.
Note: If you select the wrong date, simply click the date field again to adjust it.
4. Set Number of Rooms and Guests
This step explains how to specify the number of rooms and guests before searching for rates and availability. The system will calculate available options and pricing based on these inputs.
To perform the task (Step-by-Step)
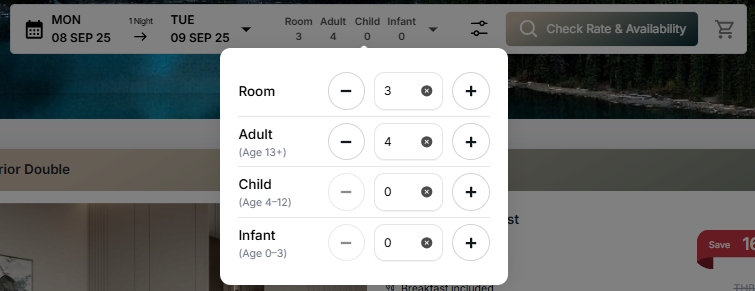
- Click the “Rooms · Adults · Children” box in the search bar. A pop-up window will appear where you can adjust the number of rooms and guests.
- Use the plus (+) and minus (–) buttons to set the desired numbers:
- For example, increase the Rooms field to 3 rooms.
- Increase the Adults field to 4 guests.
- If applicable, adjust the numbers in the Children and Infants fields.
- Click anywhere outside the pop-up window to close it. The system will automatically save your selections.
- The search bar will then display:
- Rooms: 3
- Adults: 4
- (Children and Infants will show as 0 if not specified).
Note: If the selected number of rooms or guests exceeds availability, the system will display a warning message such as “Not enough rooms available.”
5. Search for Available Rooms and Rates
This step shows how to search for available rooms and pricing once the check-in/out dates, number of rooms, and number of guests have been set.
To perform the task:
- Verify that the selected dates, number of rooms, and number of guests are correct.
- Click the “Check Rates and Availability” button in the search bar.
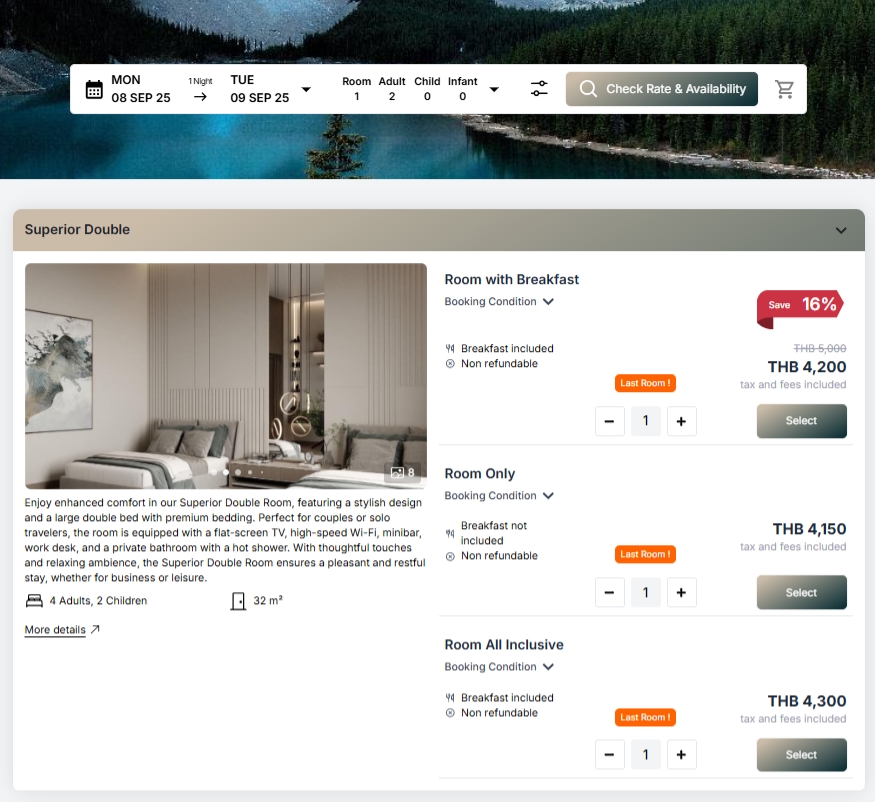
- The system will load the results page, displaying a list of available room types with price packages and a “Select” button for each option.

Note: The results page includes room details such as:
- Room name
- Room size
- Maximum occupancy
- Package conditions (e.g., “Room Only” or “Room with Breakfast” )
6. Select Room and Rate Package
This step explains how to choose the desired room type and rate package. After making a selection, add it to the cart before proceeding to fill in guest details.
To perform the task (Step-by-Step)
- On the results page, browse the available room types. Each room includes rate package cards, such as “Room Only” or “Room with Breakfast” , along with a quantity selector and a “Select” button.
- Use the plus (+) or minus (–) buttons to set the number of rooms you want.
- In most cases, you can book only 1 room of each type due to limited availability.
- If you try to reserve more rooms than available, the system will display a warning message such as “Not enough rooms suggest mixing with another room type”

- Click the “Select” button on the chosen package.
- A confirmation message will appear, for example: “1 room has been added to the cart.”
- The cart icon at the top right will update with the number of rooms selected.
- Click the cart icon at the top right to proceed to the next step: entering guest information.

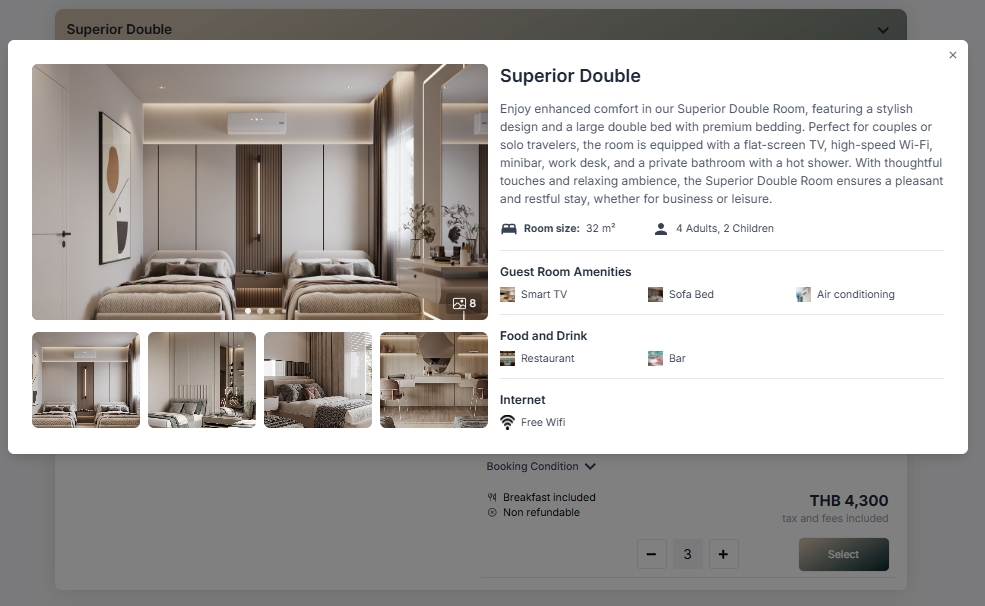
Note: Click the “View More Details” link under the room image to read additional information, such as room size and maximum occupancy.
7. Enter Guest Information
This step explains how to provide the guest’s booking details, such as name, email, phone number, and country. Guests must also accept the terms and conditions before continuing to payment.
To perform the task (Step-by-Step)
- On the Guest Information page, check the progress bar at the top. It shows three stages:
-
Select Room and Rate
-
Enter Guest Information
-
Final Step
A booking timer is also displayed.
-
- Fill in the required fields:
- Title (e.g., Mr., Miss)
- First Name and Last Name
- Email and Confirm Email (must match exactly; copy-paste may not work in some cases, so type carefully)
- Phone Number (enter the number after the country code, e.g., + 66 )
- Country/Region (select from the drop-down list, e.g., Thailand)
- If the booking is for another guest, enter their name in the “This reservation is for” field.
- If you have any preferences, type them in the “Special Requests” field.
- Tick the checkbox to confirm: “I have read and accept the Terms & Conditions and Privacy Policy” (mandatory).
- You may also tick the optional checkbox to receive news, offers, and updates.
- Choose the payment method under “Please select your payment option” :
-
PAY AT HOTEL
-
PAY NOW
If you select PAY NOW , click the “PAY NOW” button.
-
- Click “Next – Final Step” to proceed to the payment page.
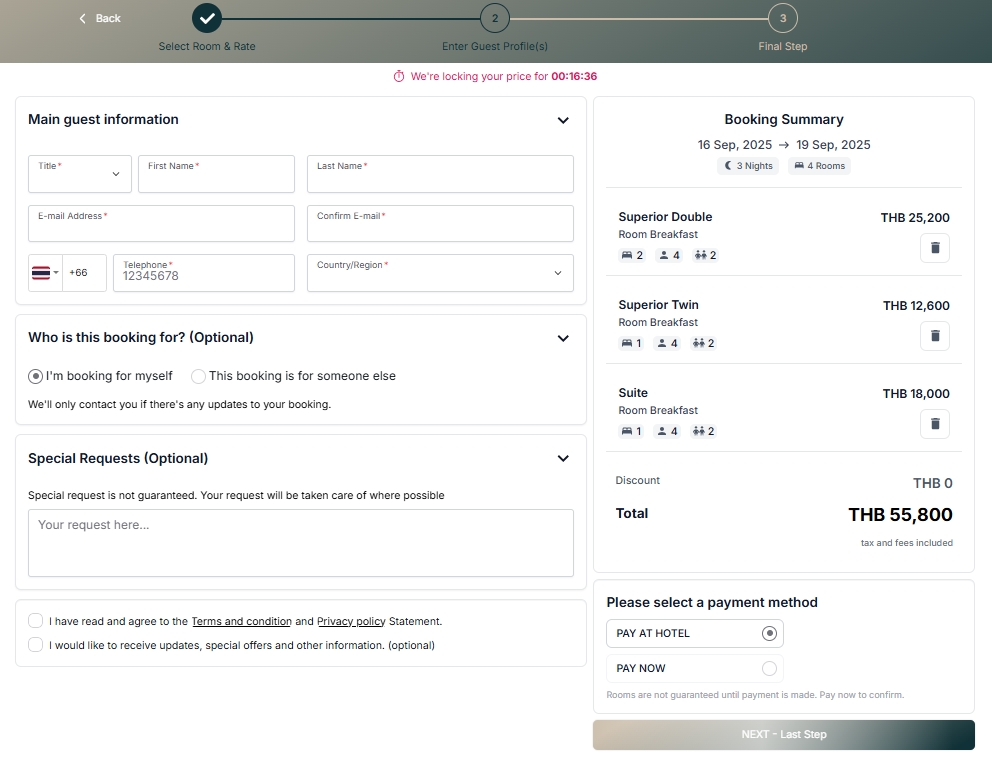
Note: If any required information is missing, or if the confirmation email does not match the original email, the system will display a red error message (e.g., “Please enter a valid email” or “Please provide a phone number” ) until corrected.
8. Payment Page (Final Step)
This step explains how to complete the booking by processing payment through the payment gateway. Guests can choose from multiple payment methods, such as credit/debit card, digital payment, or QR payment.
To perform the task (Step-by-Step)
- After clicking “Next – Final Step,” the system redirects to the 2C2P payment page.
- The page displays:
- Merchant name: DEMO Merchant TH (with property code).
- The amount due (e.g., 4,150.00 THB).
- A language drop-down menu (default: English).
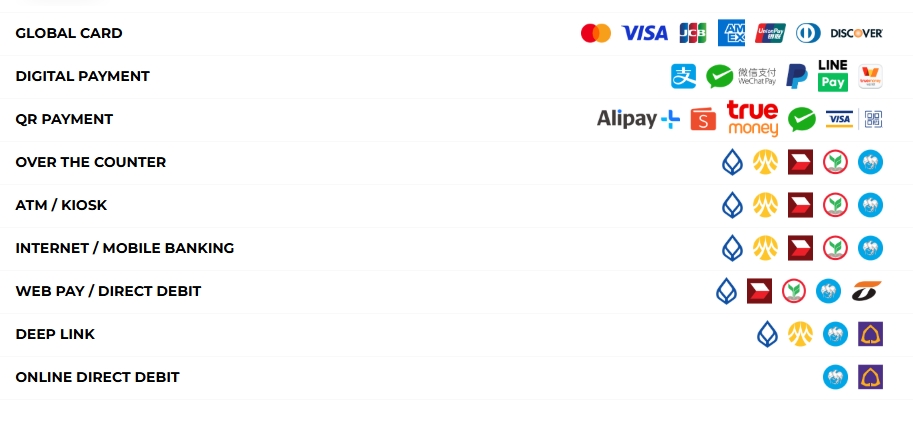
- Under the message “There are X payment options available for you!” choose a payment category, such as:
- GLOBAL CARD
- DIGITAL PAYMENT
- QR PAYMENT
- OVER THE COUNTER
- If you select GLOBAL CARD , enter the following details:
- Card Number (format: p000- 0000 - 0000 - 0000 )
- Email Address
- Optional: Instalment Options (if available)
- Click “Continue Payment” to proceed.
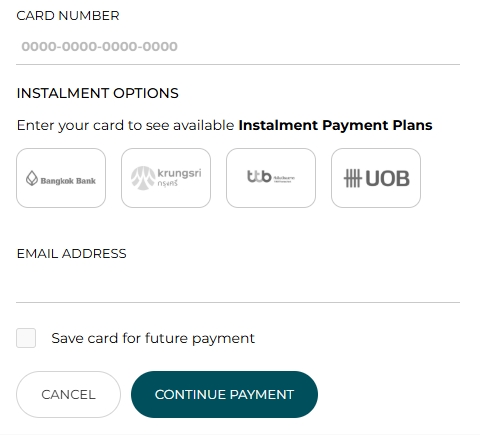
- If you choose other options (e.g., DIGITAL PAYMENT or QR PAYMENT ), click the category to expand details and follow the provider’s instructions.
- To cancel the transaction, click “Cancel.” You will return to the previous page.